
Atahualpa the best free theme I have come across. Every aspect of the design is customizable from the theme options. Here I will discuss how to add widget area in Atahualpa theme. I am using Atahualpa theme on this site so if you scroll down you will see I have widgets placed in the footer. By default Atahualpa does not come with footer widget area. So this is how you should create footer widget area in Atahualpa.
P.s. This tutorial only applies to Atahualpa theme for wordpress
The code that creates the widget area
<?php bfa_widget_area('name=FooterWid&cells=3&align=8&align_2=8&align_3=8&before_widget=<div id="%1$s">&after_widget=</div>'); ?>
Understanding the code
bfa_widget_area( //The function that creates the widget area
‘name=FooterWid& //Name of the widget area
cells=3& //Numbers of columns
align=8& //Alignment of the columns (default alignment)
align_2=8& //Alignment of the second column
align_3=8& //Alignment of the third column
before_widget=<div id=”%1$s”>& //HTML Tags to be added before every widget
after_widget=</div> //HTML Tags to be added after every widget
‘);
Thus we can understand that the above code is for creating three column widget area. If you need more or less column then change the cells value to a number of your choice.
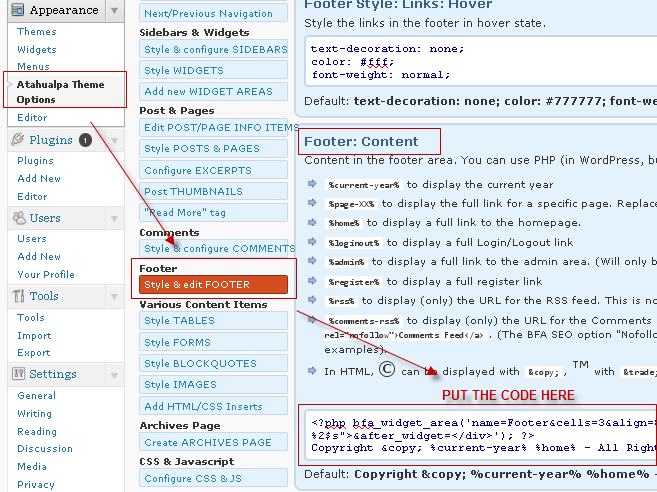
Where to add the code
From your wordpress dashboard goto
Appearance > Atahualpa Theme Options > Style & Edit FOOTER
Put the code under the Footer : Content section then save it. After saving refresh your website two to three times. After refreshing your website if you goto Appearance > Widgets, you will see three new widget area is created. These are the footer widget areas that you just created.

Do you like this article?